
Build A Sunken Outdoor Seating Area is an excellent way to transform your backyard into a cozy retreat. Unlike traditional patios, a sunken seating area offers a unique design that feels intimate and inviting. Whether you’re looking to create a stylish entertainment space or a peaceful garden hideaway, this project can elevate your outdoor living experience. The best part? With a little planning and the right materials, even beginner gardeners can bring this idea to life.
Benefits of a Sunken Outdoor Seating Area
A sunken seating area isn’t just visually appealing—it also serves practical purposes. By lowering the seating area, you create a natural sense of enclosure that enhances privacy while reducing noise from the surrounding environment. Additionally, a sunken space can protect against strong winds, making it a comfortable spot year-round. It also seamlessly integrates with landscaping elements, giving your garden a well-thought-out, cohesive look.
Planning Your Sunken Outdoor Seating Area
Before breaking ground, planning is key. First, decide on the location—considering sunlight exposure, drainage, and proximity to other garden features. Sketch out the design, determining the size and shape that best suits your space. Will it include a fire pit? Built-in seating? A pergola for shade? Mapping out these details in advance will ensure a smooth building process and a functional, aesthetically pleasing result.
Essential Tools and Materials You’ll Need
To successfully build a sunken seating area, you’ll need some essential tools and materials. Basic equipment includes a shovel, wheelbarrow, level, and measuring tape. Depending on the design, materials may include bricks, concrete blocks, gravel, sand, waterproof liners, and seating cushions. Investing in high-quality materials will ensure durability and reduce future maintenance.
Step-by-Step Guide: How to Build a Sunken Outdoor Seating Area
Building a sunken seating area requires careful execution, but breaking it down into steps makes the process manageable. From preparing the ground to adding final touches, each phase contributes to the overall success of your project.
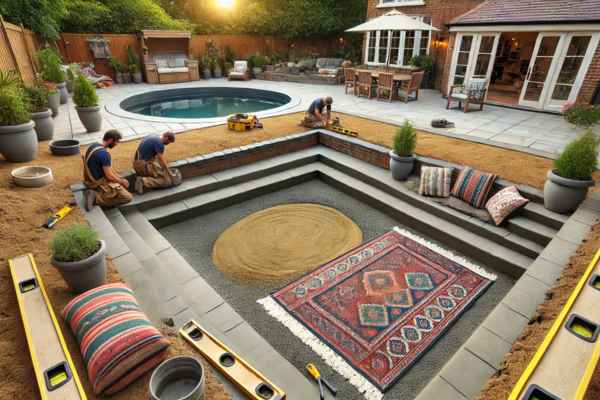
Preparing the Ground: Clearing and Marking the Area
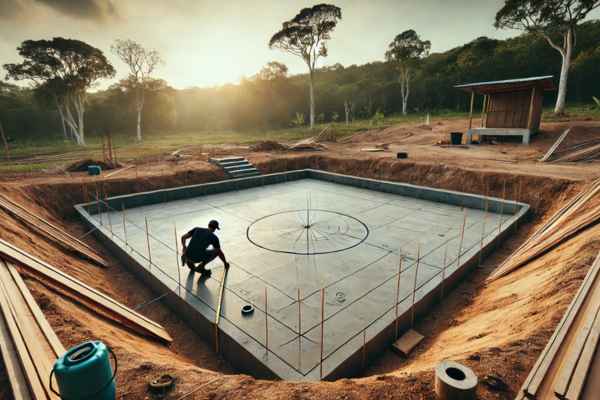
Start by clearing the selected area of any grass, debris, or obstacles. Use marking spray or stakes and string to outline the shape of the seating area. Double-check measurements and ensure the area is level before proceeding. This step is crucial in creating a well-defined space that aligns with your vision.
Digging the Pit: Tips for Getting the Depth Just Right
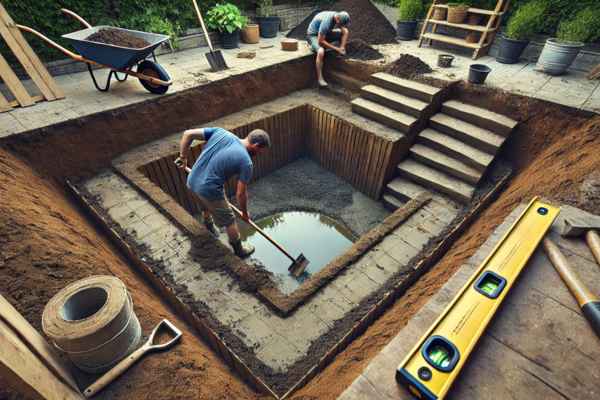
Excavating the pit requires precision. Aim for a depth of at least 12 to 18 inches, depending on the seating style you prefer. Deeper areas work well for built-in benches, while shallower designs allow for portable seating. Use a level to maintain an even base, and remove excess soil carefully to avoid unnecessary work later.
Building Strong and Stable Retaining Walls
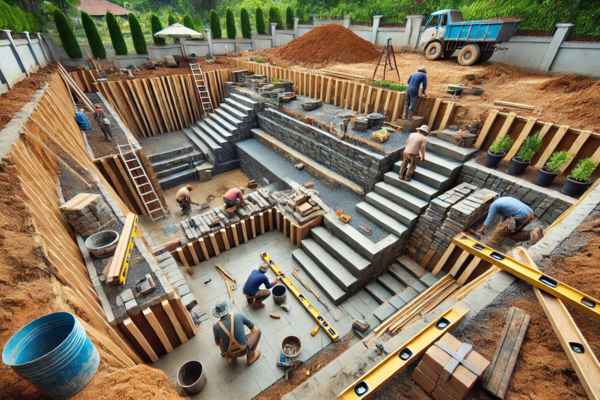
Since a sunken area involves an excavated space, retaining walls help support the surrounding soil and prevent erosion. Materials such as natural stone, bricks, or pressure-treated wood work well for this purpose. Secure the walls properly, ensuring they are level and reinforced to handle weather changes and soil movement.
Adding Drainage to Prevent Water Buildup
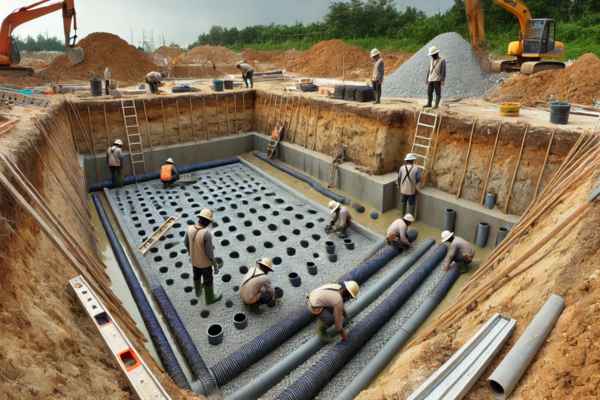
Without proper drainage, a sunken seating area can turn into a puddle after rainfall. To avoid this, install a simple drainage system using gravel and perforated pipes. Creating a gentle slope in the base also encourages water runoff. This step is especially important in areas prone to heavy rain.
Installing a Solid Base for Comfort and Durability
The foundation of your sunken seating area should be strong and comfortable. Start with a layer of compacted gravel for stability, followed by a layer of sand for smoothness. If using pavers or tiles, ensure they are evenly placed to create a polished look. For a softer feel, add weather-resistant outdoor rugs or cushions.
Design Ideas to Inspire Your Sunken Seating Area
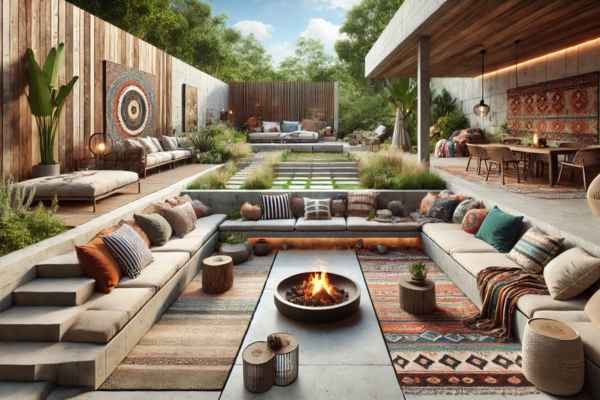
When it comes to designing your sunken outdoor seating area, the possibilities are endless. For a rustic retreat, consider using natural stone, reclaimed wood, and earthy tones to blend seamlessly with your garden. Add a fire pit in the center for a cozy gathering spot. If you prefer a modern minimalist look, opt for sleek concrete walls, geometric shapes, and monochromatic cushions. For a more boho-chic vibe, layer vibrant textiles, patterned rugs, and eclectic pillows to create a relaxed, colorful atmosphere. No matter your style, incorporating personal touches will make the space uniquely yours.
Adding Comfort and Style
Comfort is key in any outdoor seating area. Start with plush, weather-resistant cushions that invite guests to sink in and relax. Adding outdoor rugs can define the space while providing warmth underfoot. Don’t forget about lighting—string lights, lanterns, or even built-in LED strips can create a magical ambiance after sunset. For added style, include side tables for drinks, throw blankets for chilly nights, and decorative plants to soften the edges. The goal is to create a space that feels like an extension of your home, perfect for both casual hangouts and special occasions.
Landscaping Around Your Sunken Seating Area
The landscaping around your seating area can make it feel like a hidden oasis. Use shrubs and ornamental grasses to create natural borders and add privacy. Flowering plants can bring pops of color, while climbing vines on trellises or pergolas add vertical interest. Consider planting aromatic herbs like lavender or rosemary to enhance the sensory experience. Adding stone pathways or wooden steps leading down into the seating area not only improves access but also adds a charming, finished look to the overall design.
Safety Tips to Keep in Mind
While sunken seating areas are beautiful, safety should always be a priority. Ensure that retaining walls are sturdy and properly reinforced to prevent soil collapse. If the area is deep, consider installing railings or low walls to prevent accidental falls, especially if children or pets will be around. Proper lighting is essential for nighttime use—pathway lights or step lights can prevent trips and falls. Additionally, ensure the drainage system is functioning well to avoid water buildup, which can create slippery surfaces and structural issues over time.
Maintenance Tips for Long-Lasting Enjoyment
To keep your sunken seating area looking fresh year after year, regular maintenance is key. Sweep away debris regularly to prevent dirt buildup. Clean cushions and fabrics with mild soap and water, and store them during harsh weather to prolong their lifespan. Check the retaining walls for cracks or signs of shifting soil, and address any issues promptly. Inspect drainage systems periodically to ensure they are clear of debris. With routine care, your outdoor retreat will remain a welcoming space for years to come.
Budget-Friendly Tips for Building a Sunken Seating Area
Building a sunken seating area doesn’t have to break the bank. One of the best ways to save is by using recycled materials, like reclaimed wood or repurposed bricks. Opting for DIY labor instead of hiring contractors can significantly reduce costs—just be sure to plan carefully and research construction techniques. You can also start with a basic design and add features like built-in benches or fire pits later as your budget allows. Shopping for outdoor furniture during off-season sales can help you score great deals without compromising on style.
Common Mistakes to Avoid
Avoiding common mistakes can save you time, money, and frustration. One of the biggest errors is neglecting proper drainage, which can lead to water pooling and structural damage. Skipping the planning phase can result in awkward layouts or impractical designs. Underestimating the depth needed for comfort or over-digging without reinforcement can cause safety hazards. Additionally, choosing materials that aren’t weather-resistant can lead to premature wear and tear. Take the time to research, plan thoroughly, and consult experts if needed to ensure a successful project.
Final Thoughts
Building a sunken outdoor seating area is a rewarding project that can transform your backyard into a cozy, stylish haven. Whether you’re creating a space for family gatherings, peaceful solo retreats, or entertaining friends, this unique design adds character and charm to any outdoor area. With thoughtful planning, the right materials, and a bit of creativity, you can create an inviting space that reflects your personality and enhances your outdoor living experience. So grab your tools, get inspired, and start digging your way to the perfect backyard oasis!