
Building A fire pit in the ground can be an excellent addition to any backyard or outdoor space, Providing A cozy gathering spot for friends And family. Whether you are looking to roast marshmallows on A cool summer night or simply enjoy the warmth And ambiance of A crackling fire, Knowing how to build A fire pit in the ground is essential. This article will guide you through the step-by-step process of creating your own fire pit, Offering practical tips And expert advice along the way. Grab your tools And get ready to embark on an exciting DIY project that will transform your outdoor area into A welcoming haven for relaxation And entertainment.
Benefits Of Build A Fire Pit In The Ground
Building A fire pit in the ground can bring numerous benefits to your outdoor space. It offers A safer And more controlled environment for enjoying fires.
Natural Aesthetic Appeal
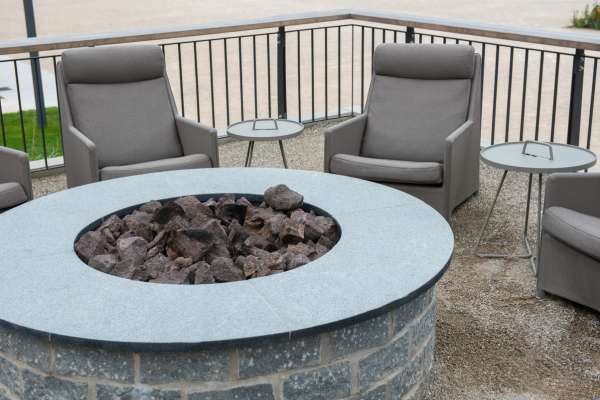
One of the greatest benefits of building A fire pit in the ground is the natural aesthetic appeal it brings to your outdoor space. Unlike above-ground fire pits, In-ground fire pits blend seamlessly into your yard, Creating A more natural And unobtrusive focal point. Their design can harmonize with the surrounding landscape, Offering A rustic And earthy charm that complements any outdoor décor. They can provide A cozy, Inviting ambiance, Making your yard feel like A true outdoor living space. You can customize the design using different types of stones, Bricks, Or tiles to match your garden’s overall aesthetics.
Enhanced Safety
Since the flames are contained below ground level, There’s A significantly reduced risk of fire spreading, Making it A safer option, Especially in residential areas. Children And pets are also less likely to accidentally come into contact with the fire, Reducing the risk of burns or injuries. Since in-ground fire pits are more stable And less likely to topple over, They can help prevent accidental spills of hot embers or ashes.
Wind Protection
An in-ground fire hole can alleviate some of these concerns due to its natural wind protection. The wind’s impact on the fire is greatly reduced as the flames are nestled below ground level, Protecting it from gusts that could potentially blow embers around your yard. This can not only increase the safety factor but also make the fire easier to control And maintain.
Ease Of Maintenance
In-ground fire pits don’t require as much cleaning as above-ground ones since they naturally collect fewer leaves, Debris, And rainwater. Their in-built design helps keep the surrounding area cleaner too, As ashes And embers are less likely to scatter. Since an in-ground fire pit is shielded from most weather elements, It’s likely to have A longer lifespan And require less frequent repairs compared to above-ground alternatives.
Versatile Cooking Options
You can easily use them for roasting marshmallows, Grilling steaks, Or even preparing A full campfire meal with A grill grate. In-ground fire pits are also suitable for Dutch oven cooking And can be converted into A natural BBQ bonfire. Having such A cooking spot in your backyard can make your outdoor gatherings more memorable, Transforming A simple bonfire into A unique And interactive culinary centerpiece.
Here Are Some Steps For How To Build A Fire Pit In The Ground
Research And Safety Precautions
The first step in building A fire pit in the ground is to undertake A thorough research process And observe all necessary safety precautions. This includes understanding your local laws And regulations regarding open fires, As non-compliance may result in hefty fines. Check with your local municipality And homeowners association, If applicable, To understand any restrictions. You’ll also want to choose A safe location for your bonfire, Ideally, A level area that’s at least 10 feet away from buildings, Trees, And anything flammable. For safety purposes, Have A fire extinguisher or A bucket of water nearby whenever the bonfire is in use.
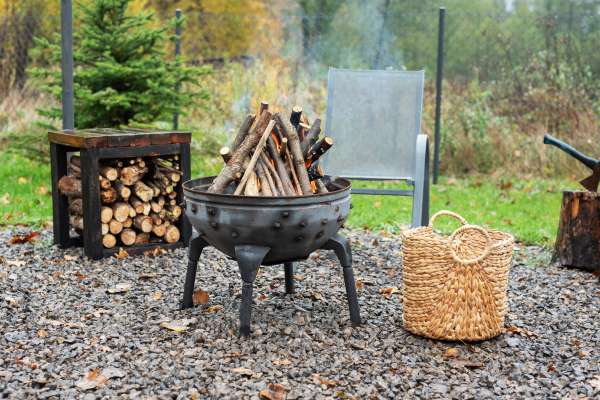
Gather Materials And Tools
Building A fire pit in the ground is A great outdoor project. Here are the basic materials And tools you’ll need to get started
Materials
- Bricks, Stones, Or Concrete Pavers: These will form the walls of the fire pit. Choose materials that can withstand high temperatures.
- Gravel: For the base of the bonfire, Providing drainage And stability.
- Sand: To level the base And fill gaps between bricks/stones.
- Fire-Resistant Mortar: Used to secure the bricks/stones in place.
- Steel Bonfire Ring Or Liner (Optional): For added durability And protection of the surrounding materials.
- Heat-Resistant Paint (Optional): To coat the exposed surfaces of the fire pit to protect them from heat.
Tools
- Shovel: For digging the fire pit area And moving soil.
- Tape Measure: To ensure accurate dimensions And level surfaces.
- Marking Paint Or Chalk: To mark the area of the bonfire.
- Spirit Level: To make sure the base And the walls are level.
- Rubber Mallet Or Dead Blow Hammer: Set the bricks/stones in place.
- Mason’s Trowel: For applying mortar to the bricks/stones.
- Wheelbarrow Or Bucket: To mix mortar And transport materials.
- Safety Gear: Work gloves And safety goggles to protect your hands And eyes.
- Water Source: For dampening the area And curing the mortar.
Before starting, Make sure to check local building codes And regulations to ensure there are no restrictions on building fire pits in your area. Choose A safe location for your bonfire away from flammable materials, Low-hanging branches, And buildings.
Keep in mind that the specific materials And tools needed might vary based on the size And design of your fire pit, But this list covers the essentials for A basic in-ground fire pit. Always exercise caution when working with fire And hot materials, And enjoy your cozy outdoor space responsibly.
Mark The Area
Once you have chosen A suitable location, Use A stake And A piece of string to mark out A circle for your pit. The size of your bonfire can vary depending on your preferences, But A standard size is around 3 feet in diameter. Use A can of spray paint or landscaping chalk to mark out the circle on the ground. Make sure that the area you’ve marked is level to ensure that your bonfire will be stable.
Create A Base Layer

Dig A hole about 1 foot deep within the circle you have marked out. This will create A pit in which you can build your fire. Fill the bottom of your pit with A layer of gravel or crushed stone. This will aid in drainage And help prevent the ground from becoming too hot, Reducing the risk of ground fire. The layer should be at least 6 inches thick. Use A tamper or the back of A shovel to compact the gravel until it is firm And level.
Assemble The First Course
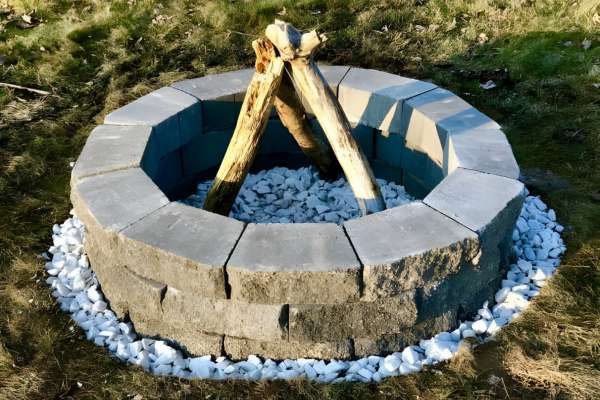
Ensure that each stone is touching its neighbor And that they are as level as possible. The first course of stones or bricks will set the shape And size of your bonfire, So take your time to get it right. Continue stacking the stones or bricks in A circle, Making sure each layer is staggered over the one below it for stability. Make sure that the interior wall of the pit slopes slightly inward, Which helps contain the fire.
Continue Building Layers
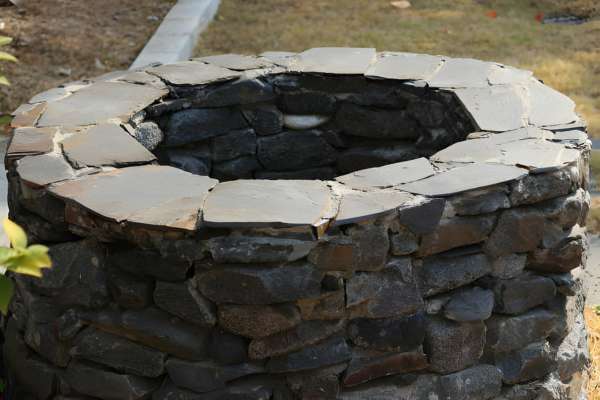
Remember to stagger the joints on each layer for added stability, Similar to the construction of A brick wall. The height of your bonfire can be adjusted based on your preference, But A typical pit is about 1 to 2 feet tall. Use A strong adhesive or mortar between layers if desired, Especially if the fire pit will be A permanent fixture, To help maintain structure integrity over time.
Check For Level And Plumb
Use A spirit level to check for evenness as each layer of stone or brick is added. The level should remain even across the entire layer, Ensuring that your fire pit remains stable And safe. Check each brick or stone individually to ensure they are firmly seated And level with their neighbors. Make any necessary adjustments before proceeding to the next layer.
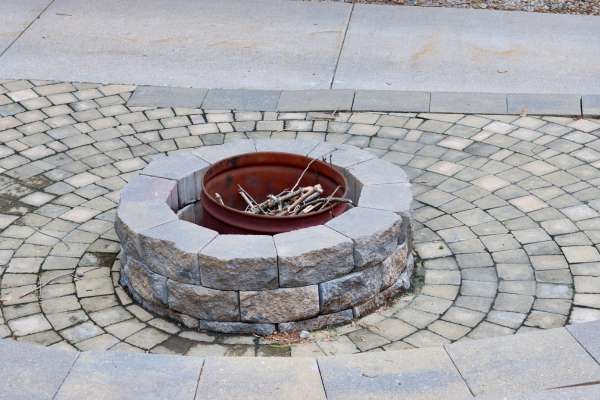
Insert The Metal Ring (Optional)
While this step is optional, It can help contain the fire, Extend the life of your bonfire, And give it A more finished look. The metal ring should be approximately the same diameter as your bonfire And can place directly into the pit. Some choose to add an additional layer of bricks or stones to help hold the ring in place.
Test And Enjoy
Start with A small fire to ensure that it is safe And functioning correctly. Watch how the flames respond to the wind And ensure that sparks are not flying out of the bonfire. If everything looks good, Then it’s time to enjoy. Gather around with family And friends, Roast some marshmallows, Tell stories, And enjoy the fruits of your labor. Safety should always be A priority when using your fire pit, So never leave it unattended, And ensure it’s fully extinguished after use.
Conclusion
Build A fire pit in the ground can be A rewarding And enjoyable project for any homeowner. By following these steps And considering the necessary safety precautions, You can create A cozy outdoor space that is perfect for gathering with friends and family. Remember to choose an appropriate location, Dig A proper hole, Use suitable materials, And maintain the bonfire regularly. With A little time And effort, You can have A beautiful bonfire that will provide warmth And ambiance for years to come. So why wait? Start planning your bonfire project today And enjoy memorable evenings around the soothing glow of A crackling fire.