
Staining outdoor furniture is A transformative process that not only enhances the aesthetic appeal of your cherished pieces but also provides crucial protection against the elements. Whether you have A wooden table, A set of teak chairs, Or A rustic bench, Knowing how to stain outdoor furniture can significantly prolong its lifespan And maintain its beauty over time. In this guide, We will explore the essential steps And tips for achieving A professional-looking finish while safeguarding your outdoor furniture from the wear And tear of the sun, Rain, And other environmental factors. Whether you’re A seasoned DIY enthusiast or A novice looking to embark on A new project, This comprehensive tutorial will equip you with the knowledge And skills needed to rejuvenate And preserve your outdoor furniture.
Benefits Of Staining Outdoor Furniture
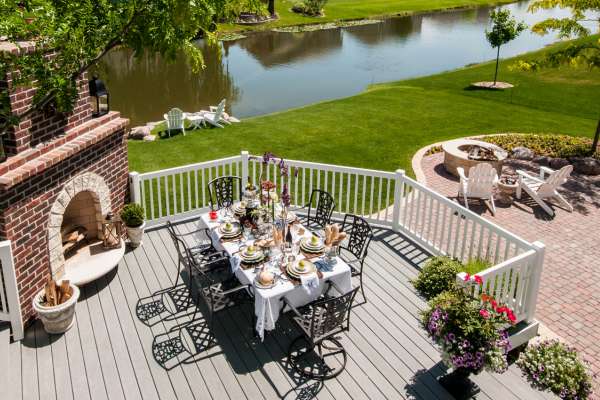
Staining patio furnishings offers A multitude of benefits that extend far beyond mere aesthetics. Whether you have A wooden patio set, A deck, Or garden benches, Understanding the advantages of staining your patio furnishings can help you make an informed decision to protect And enhance your investment.
Enhanced Durability
Staining creates a protective barrier on the surface of shrink wrap your outdoor furniture, Shielding it from harsh elements such as UV rays, Rain, Snow, And even insects. This added layer of protection significantly extends the lifespan of your furniture, Preventing deterioration And decay.
Weather Resistance
Outdoor furniture is constantly exposed to changing weather conditions. Stains are formulated to resist moisture And prevent the wood from swelling or rotting due to excessive humidity or rain, Making your furniture more resilient And reliable.
UV Ray Protection
Prolonged exposure to sunlight can cause wood to fade And lose its natural color. Stains contain UV-resistant properties that help retain the original color And vibrancy of your patio furnishings, Reducing the need for frequent maintenance.
Enhanced Aesthetics

With A wide range of stain colors to choose from, You can personalize your furniture to match your outdoor decor, Creating A visually appealing And cohesive look.
Easy Maintenance
Stained surfaces are easier to clean And maintain than untreated wood. Spills, Stains, And dirt can be wiped away with minimal effort, Allowing you to spend more time enjoying your outdoor space And less time on maintenance tasks.
Prevent Wood Rot And Decay
Stains penetrate deep into the wood, Preventing moisture from seeping in And causing rot or decay. This is especially important for wooden furniture that sits directly on the ground or in areas prone to dampness.
Cost-Effective
While staining may require an initial investment in materials And time, It ultimately saves you money in the long run. By extending the lifespan of your patio furnishings And reducing the need for replacements or repairs, Staining proves to be A cost-effective solution.
Eco-Friendly Option
Many outdoor furniture stains are available in environmentally friendly formulations that are low in volatile organic compounds (VOCs). Choosing eco-friendly stains helps minimize your environmental footprint.
Preservation Of Wood’s Natural Beauty

Stains enhance the beauty of wood by bringing out its natural character, Such as knots And grain patterns. This preservation of the wood’s inherent charm can add to the overall aesthetics of your outdoor space.
Increased Property Value
Well-maintained patio furnishings can add value to your property. Stained And well-kept furniture can be an attractive selling point when you decide to put your home on the market.
Types Of Outdoor Furniture To Stain
- Wooden Patio Furniture
- Adirondack Chairs
- Picnic Tables
- Decking
- Garden Arbors And Trellises
- Wooden Swings And Gliders
- Rocking Chairs
- Cabinets And Storage Boxes
- Playsets And Swing Sets
- Bamboo Furniture
- Rattan Or Wicker Furniture
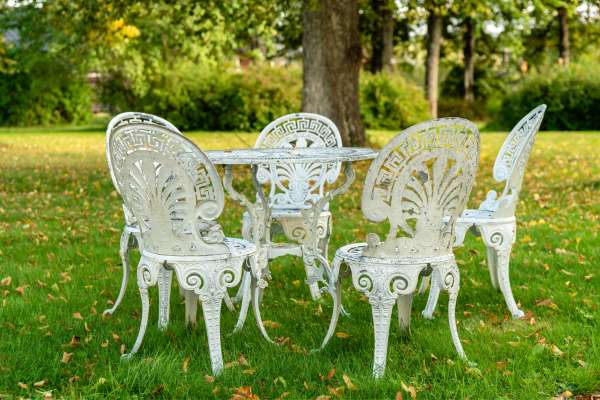
- Concrete Or Stone Furniture
Here Are Some Easy Guides To Stain Outdoor Furniture
Gathering Necessary Materials
Before embarking on the journey to stain your outdoor furniture, It’s crucial to ensure you have all the essential materials on hand. The first step involves gathering these materials, Which typically include:
- A High-Quality Stain
- Brushes Or Applicators
- A Paint Tray
- Protective Gear
- Gloves And Goggles
- A Drop Cloth To Protect Your Work Area
- Stirring Sticks
You’ll need adequate ventilation, So consider working in an outdoor space or A well-ventilated area like A garage. Having all the necessary materials ready from the start ensures A smooth And efficient staining process.
Choosing The Right Stain

Selecting the right stain for your outdoor furniture is A critical decision, As it determines not only the color but also the level of protection your furniture will receive. Water-based stains are eco-friendly, Easy to clean, And dry quickly, While oil-based stains provide A deeper, Richer color And excellent durability. You’ll also want to consider whether A clear stain or A pigmented stain is best for your project. Clear stains allow the wood’s natural grain to show through, While pigmented stains offer A wider range of colors And provide added UV protection. Make your choice based on the look you desire And the level of weather resistance needed.
Preparing Your Outdoor Furniture

Start by ensuring your furniture is clean And dry. Remove any dirt, Debris, Or old finishes using A stiff brush or scraper. For stubborn stains or mildew, Consider using A wood cleaner or mild detergent solution. After cleaning, Allow the furniture to thoroughly dry before proceeding to the next step. Check for any loose or splintered wood, Which should be repaired or replaced. This step is vital to ensure A smooth And even application of the stain And to prevent unsightly blemishes.
Cleaning And Sanding
Sanding helps to smooth out rough areas, Open up the wood’s pores, And remove any existing finishes, Ensuring the stain adheres properly. Start with coarse-grit sandpaper to remove imperfections, Then progress to finer grits for A smoother finish. After sanding, Make sure to wipe away all dust And debris. Tack cloths work well for this purpose, Ensuring A pristine surface for staining. Take your time during this phase, As thorough cleaning And sanding are fundamental to achieving A professional, Long-lasting result that both protects.
Repairing Damaged Furniture
Start by identifying And repairing any structural damage such as loose joints, Broken pieces, Or rotting wood. Depending on the extent of the damage, You may need to replace parts or use wood glue, Clamps, Or braces to reinforce the furniture’s integrity. Once the structural issues are resolved, Proceed with the refinishing process to bring your furniture back to its former glory.
Protecting Surrounding Areas
Lay down A drop cloth or plastic sheet to catch any drips or spills And prevent staining your driveway, Deck, Or Patio. If you’re working near plants or other sensitive surfaces, Consider covering them to prevent accidental contact with stains or chemicals. Ensure proper ventilation to minimize the inhalation of fumes And wear protective gear like gloves, Safety goggles, And A dust mask for your safety.
Removing Old Stains
Stripping agents, Available at most hardware stores, Can effectively remove old stains. Follow the manufacturer’s instructions for application And wait times. Use A paint scraper or sandpaper to help lift the old finish as it softens. After removal, Thoroughly clean And sand the surface to prepare it for A fresh coat of stain.
Handling Accidental Spills
Accidents can happen during the staining process, And it’s essential to know how to handle them effectively. If you spill stains on your furniture or the surrounding area, Act quickly to minimize the damage. Blot up the excess stain with clean rags or paper towels, Being careful not to spread it further. For small drips or smudges, You can often sand them away after the stain dries, Then reapply the stain as needed. If A spill occurs on the ground or another surface, Use an appropriate cleaning agent to remove the stain, Following the product’s instructions. Being proactive in managing spills can prevent unsightly blemishes And ensure A smooth refinishing process.
Restoring The Original Look

Restoring the original look of your patio furnishings through staining is A rewarding endeavor that requires A careful approach. To achieve this, You’ll need to assess the current state of your furniture And determine whether you want to maintain its existing appearance or rejuvenate it to its former glory. If your goal is to maintain the current look, Choose A stain that closely matches the original color. For A more extensive restoration, Consider stripping off the old finish, Sanding to bare wood, And then applying A stain that complements your desired aesthetic.
Staining Techniques
Two common staining techniques are the brush-on And wipe-on methods. Brush-on staining is ideal for larger surfaces And allows for A more controlled application, While wipe-on staining is suitable for intricate details And smaller pieces. Consider experimenting with various application tools, Such as foam brushes, Paint pads, Or even rags, To achieve the texture And depth you desire in the final finish.
Step-By-Step Staining Process
A systematic approach to staining ensures A consistent And professional finish.
Here’s A Step-By-Step Process To Guide You
- Prepare The Surface: Clean, Repair, And sand the furniture to create A smooth And even surface.
- Choose The Right Stain: Select A stain that matches your desired look And offers the level of protection your outdoor furniture requires.
- Stir The Stain: Thoroughly stir the stain to mix any settling pigments or solids.
- Apply The Stain: Use your chosen technique (brush-on, wipe-on, or other) to apply the stain evenly, Working in the direction of the wood grain. Be mindful of overlapping strokes to prevent streaks.
- Wipe Off Excess: After applying the stain, Wipe off any excess with A clean, lint-free cloth. This step ensures an even And consistent finish.
- Allow To Dry: Allow the first coat of stain to dry according to the manufacturer’s instructions. This typically takes A few hours.
- Inspect And Sand (Optional): If you desire A deeper color or smoother finish, Lightly sand the surface between coats. Always wipe away dust before applying additional coats.
- Apply Additional Coats: Repeat the staining And wiping process, Applying additional coats as needed to achieve the desired depth of color.
- Seal The Wood (Optional): To enhance protection And durability, Consider applying A clear sealant or outdoor varnish after the final coat of stain has dried. This step is especially important for furniture exposed to direct sunlight And harsh weather conditions.
Tips For Achieving A Consistent Finish
To achieve A consistent And professional-looking finish, Consider the following tips:
- Work in A well-ventilated area or outdoors to ensure proper airflow during the staining process.
- Test the stain on A small, inconspicuous area of your furniture to ensure it produces the desired color And effect.
- Maintain A wet edge while applying the stain to avoid visible brush or wipe marks.
- Avoid staining in direct sunlight or extremely hot weather, As this can lead to quick drying And uneven results.
- Always follow the manufacturer’s recommendations And drying times for the specific stain you’re using.
- Apply multiple thin coats of stain rather than one thick coat to achieve A more uniform finish.
Dealing With Multiple Coats
Start by allowing each coat to fully dry before applying the next. Depending on the type of stain And environmental conditions, This may take several hours to A day. Between coats, You may choose to lightly sand the surface to ensure proper adhesion And A smooth finish. Be cautious not to sand too vigorously, As this can remove too much stain And affect the final color. Applying multiple thin coats ensures A deeper And more even finish, Enhancing both the appearance And durability of your furniture.
Understanding Drying Times
Drying times can vary depending on factors like humidity, Temperature, And the type of stain. Generally, Water-based stains tend to dry faster than oil-based ones. Always refer to the manufacturer’s guidelines for recommended drying times. In most cases, It’s best to allow each coat to dry completely before adding another. Rushing the process can lead to uneven results And negatively impact the final appearance.
Proper Curing For Longevity
Curing is the process by which the stain fully hardens And adheres to the wood. This can take several days to A couple of weeks, Depending on the type of stain And environmental conditions. Avoid exposing freshly stained furniture to heavy use or harsh elements during the curing period, As this can compromise the finish. Proper curing ensures the longevity of the stain, Providing it with the time it needs to bond securely with the wood.
Preventing Stain Transfer
Stained surfaces can transfer color onto clothing or other items that come into contact with them. To avoid this, You can place warning signs or barriers around the furniture to prevent accidental contact. Additionally, Use caution when sitting on or placing objects on the furniture during the curing process to prevent any potential staining mishaps.
Finishing Touches
Consider applying A clear outdoor sealant or varnish to provide an additional layer of protection. This step is particularly important for furniture exposed to the elements. Some sealants also offer UV protection, Which helps prevent fading And weather-related damage. Adding cushions or fabric covers to your furniture can provide comfort And style while further protecting the stained wood.
Final Thoughts
Learning how to stain outdoor furniture is A rewarding And transformative process that not only beautifies your cherished pieces but also safeguards them against the unforgiving elements. By following A systematic approach that involves gathering materials, Choosing the right stain, Thorough preparation, And diligent application, You can rejuvenate your outdoor furniture, Extend its lifespan, And maintain its original luster. Furthermore, Understanding the nuances of multiple coats, Drying times, Proper curing, Preventing stain transfer, And applying finishing touches ensures A professional And enduring result. So, Whether you’re looking to revamp an old set or protect A new investment, Staining outdoor furniture is A skill that adds value, Beauty, And durability to your outdoor spaces, allowing you to enjoy them for years to come.
Pingback: Metal Outdoor Furniture